Moisture meters take the guesswork out of irrigation. Whether you’re growing in soil or rockwool, a reliable meter helps you schedule feeds, prevent over-watering, and achieve consistent dry-backs. This guide explains the differences between using a meter in each substrate, shows you the exact steps, and shares pro tips for avoiding false readings from issues like salt buildup (“salt block”).
Why Moisture Meters Matter
- Precision irrigation: Water only when the root zone actually needs it.
- Healthier roots: Reduce hypoxic conditions and root disease caused by wet feet.
- Repeatable dry-backs: Hit target % loss between irrigations to steer growth and resin production.
- Data, not guesses: Track substrate moisture trends across zones, strains, and tables.
Meter Types You’ll See Most
- Capacitive/volumetric sensors (display VWC/% water content): excellent for rockwool and coco; great for data logging.
- Resistive/probe meters (simple wet/dry scale): affordable, fine for soil spot checks, but more sensitive to salts.
Using a Moisture Meter in Soil
Step-by-Step
- Calibrate (if applicable): Follow the manufacturer’s instructions. Zero the device and confirm it reads consistently in a known medium (e.g., damp paper towel vs. air).
- Pick a consistent spot: Choose a point halfway between the stalk and the container wall to avoid root mass extremes.
- Insert the probe slowly: Go straight down to the same depth every time (commonly halfway to two-thirds of pot depth). Avoid hitting the pot wall.
- Wait for a stable reading: Give the sensor a few seconds to settle; note the value and timestamp.
- Map the container: Take 2–3 readings per pot (front/center/back) for representative data. Average them.
- Log & set thresholds: Record readings daily. Establish target ranges for veg vs. flower and adjust irrigation volume/frequency to keep within range.
Soil target example (varies by mix & pot size): water when the meter trends toward your lower band (e.g., 25–30% VWC) and stop irrigating as you approach your upper band (e.g., 40–45% VWC). Track plant response and dial in.
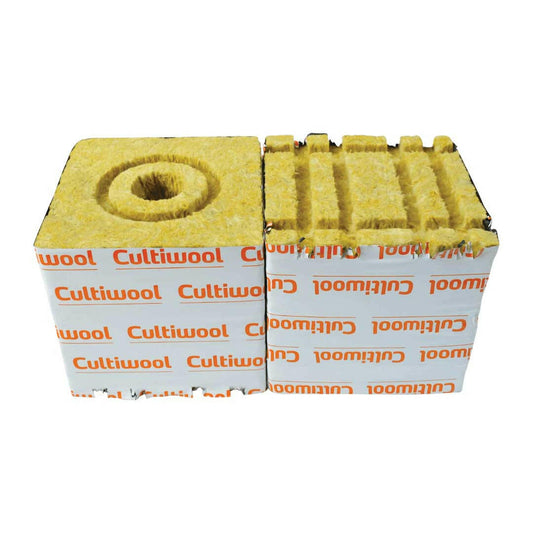
Using a Moisture Meter in Rockwool
Step-by-Step
- Pre-condition the block/plug: Hydrate to working EC and pH, then drain to field capacity.
- Use a slim probe: Insert at a 45° angle into the center mass of the cube/slab, avoiding the top dry crust and bottom saturation zone.
- Consistent depth & location: Mark the probe’s insertion point so staff repeat it perfectly each day.
- Measure after irrigation events: Take readings at set intervals—immediately post-shot, then hourly—to understand dry-back (%) across the photoperiod.
- Steer with data: For generative steering, aim for deeper dry-backs (e.g., 12–20% daily). For vegetative steering, tighten the dry-back (e.g., 6–12%). Adjust first shot timing, shot size, and shot count accordingly.
Pro Tips (Soil & Rockwool)
- Watch for “salt block”/salt buildup: Fertilizer salts on probe tips or in the top crust can skew readings. Wipe probes with distilled water and a soft cloth; take measurements below the salt crust.
- Temperature matters: Extreme substrate temps change dielectric properties and can shift readings. Note temperature when logging.
- Standardize insertion: Same depth, angle, and location each time. Inconsistent technique = inconsistent data.
- Avoid roots & drippers: Hitting a thick root or a wet channel near an emitter misrepresents average moisture.
- Verify with weight: Periodically weigh a pot or slab before/after irrigation to confirm the meter’s story.
- Reset baselines after media change: New soil blends or rockwool densities require new target ranges.
- Clean probes weekly: Especially in fertigation programs with higher EC.
Troubleshooting Quick Chart
| Symptom | Likely Cause | Fix |
|---|---|---|
| Readings bounce all over | Inconsistent insertion depth/angle; hitting roots or drippers | Mark insertion points; avoid emitters; take multiple readings and average |
| Meter always reads “wet” | Salt block on probe; measuring near saturation zone | Clean probe; move deeper into media center; recheck after brief dry-back |
| Dry-back seems too fast | High VPD, small pots, or low EC reducing water retention | Increase shot count or volume; adjust climate and EC targets |
Implementation Checklist
- Choose a meter matched to your substrate (capacitive for rockwool; capacitive or resistive for soil).
- Document a standard operating procedure (depth, angle, timing, logging sheet).
- Set veg vs. flower moisture bands and daily dry-back targets.
- Audit weekly for salt buildup and recalibrate as needed.
- Train staff to take and log readings the same way, every time.
FAQ
What’s a good daily dry-back for rockwool?
It depends on your plant stage and steering goals. As a starting point, 6–12% total daily dry-back supports vegetative growth; 12–20% supports generative steering. Always watch plant feedback and adjust.
How often should I calibrate my moisture meter?
Follow the manufacturer’s guidance. In high-throughput rooms, a monthly check is common—plus anytime readings feel “off,” after probe cleaning, or when you change substrate types.
Why do my soil readings vary pot to pot?
Soil mixes are heterogeneous. Take multiple readings per pot, avoid edges, and average your values. Weighing a pot occasionally is a great cross-check.
Can fertilizer salts really affect readings?
Yes. Salt residues on sensors or in the top crust alter electrical properties and can cause falsely “wet” readings. Wipe probes with distilled water and measure below the crust.
Is a basic two-prong meter good enough?
For quick soil spot checks, yes. For rockwool slabs or data-driven irrigation strategy, a capacitive meter (or a logger capable of VWC) is worth the upgrade.
Key Takeaways
- Standardize where and how you measure.
- Track trends, not single numbers.
- Clean probes and watch for salt block.
- Use moisture data to time shots, set volumes, and hit dry-back targets.





0 comments